Upload results to ALM
Upload results to ALM
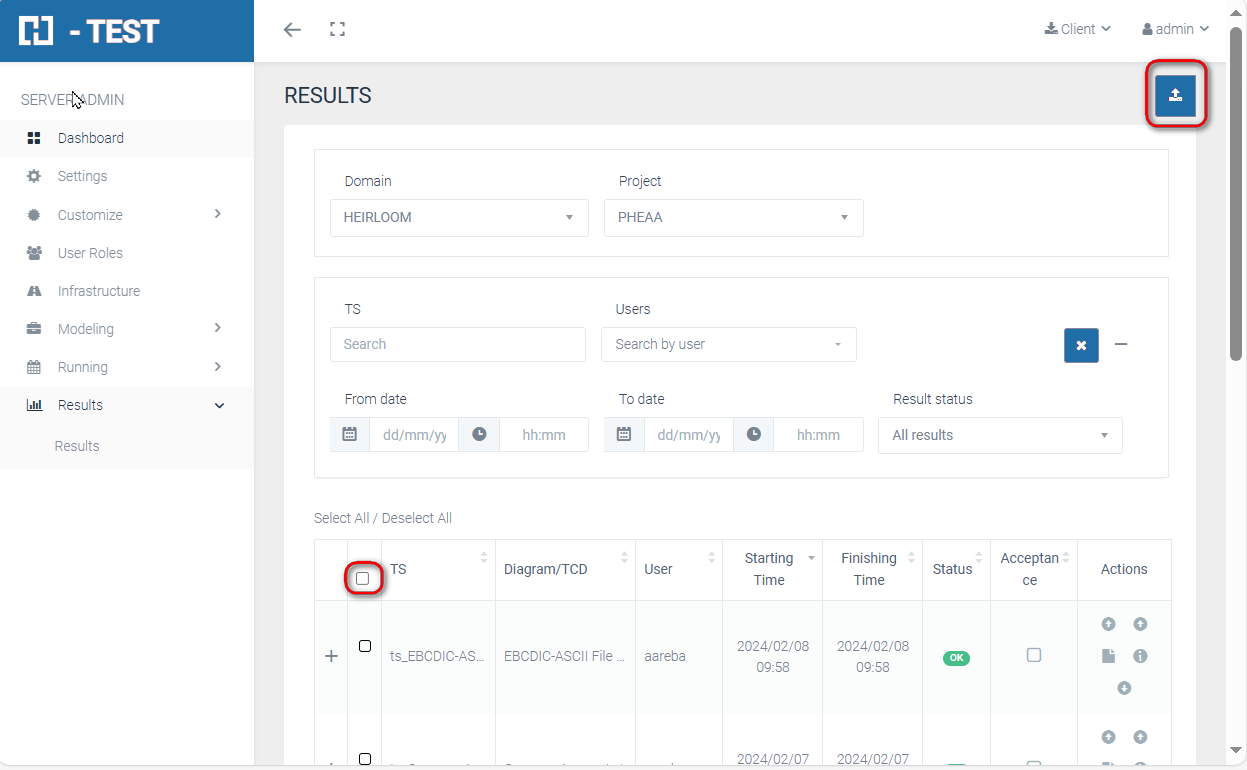
Sometimes you may want to optimize your time by running your tests without uploading to ALM, with the idea of uploading them later on, when you´re satisfied with the results, or just because you want to upload them while you have lunch. The option “Upload results to ALM” on the Top Right corner will help you to organize your schedule and decide when and what you want to upload to ALM.
This option allows to upload to ALM a Test Set, or a group of them. You can use the data fields to filter the results list. If you want to upload a set of TS as a result of your filter, you can check-in the “Select all” check/box and all the elements displayed will be selected. The check box is located on the left side of the List headers.
Only the visible elements will be selected; this means that if the result of the filter uses more than one page, only the visible page will be affected. Would you want to select more TS, you can navigate to the next screen and select the rest of TS, the previous selection will remain active unless you check-out the “Select all” option.
Once you are happy with the selection, press the “Upload results to ALM” button.
A new screen will be displayed to define the parameters of the upload.
NECESITO IMAGEN
All fields must be fulfilled before the upload is allowed:
-
Test Set Name (manual input).
-
ALM Domain (a dropdown box allows to select the Domain).
-
ALM Project (a dropdown box allows to select the Project).
-
Test Plan Folder (a pop-up window will show the Folder Tree corresponding to the Domain/Project).
-
Test Lab Folder (a pop-up window will show the Folder Tree corresponding to the Domain/Project/Test Plan).
No Comments