Excel File Adaptor example
Description
Through the Excel Adaptor, H-TEST can manage Excel files (of .xls and .xlsx types) and test them. It’s possible to perform single tests with this adaptor or end to end tests connecting with other adaptors either.
Statement of the exercise
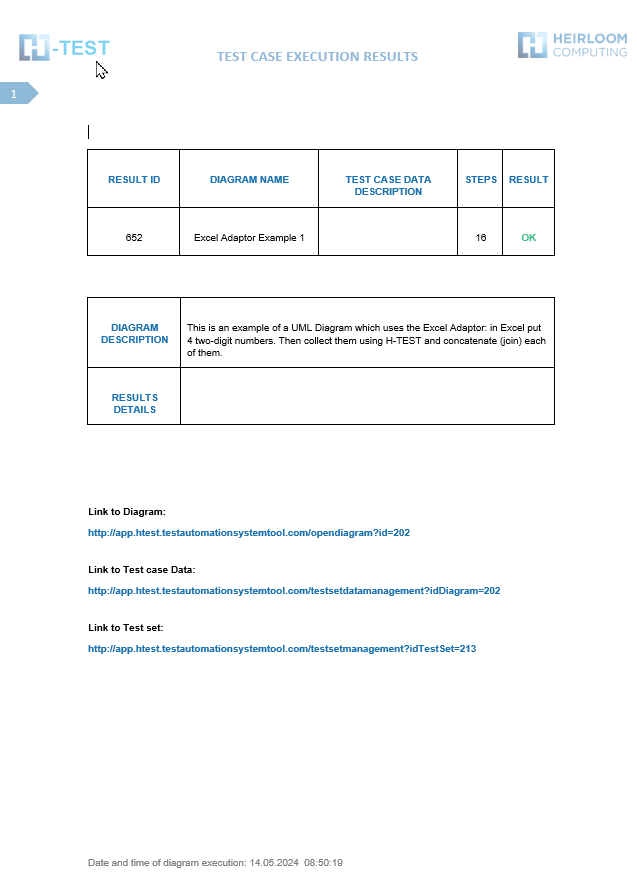
In Excel put 4 two-digit numbers. Then collect them using H-TEST and concatenate (join) each of them.
When you have gone from 4 variables, to 2 thanks to concatenate, perform the multiplication of both, addition and subtraction.
You can perform as many mathematical operations as you can think of. When you have performed all the operations, save the results in Excel.
Tip: to operate mathematically they must be numbers: integer, float....
Tip: useful functions -> getTableValue, setTableValue, getNumRows, getNumColumns...
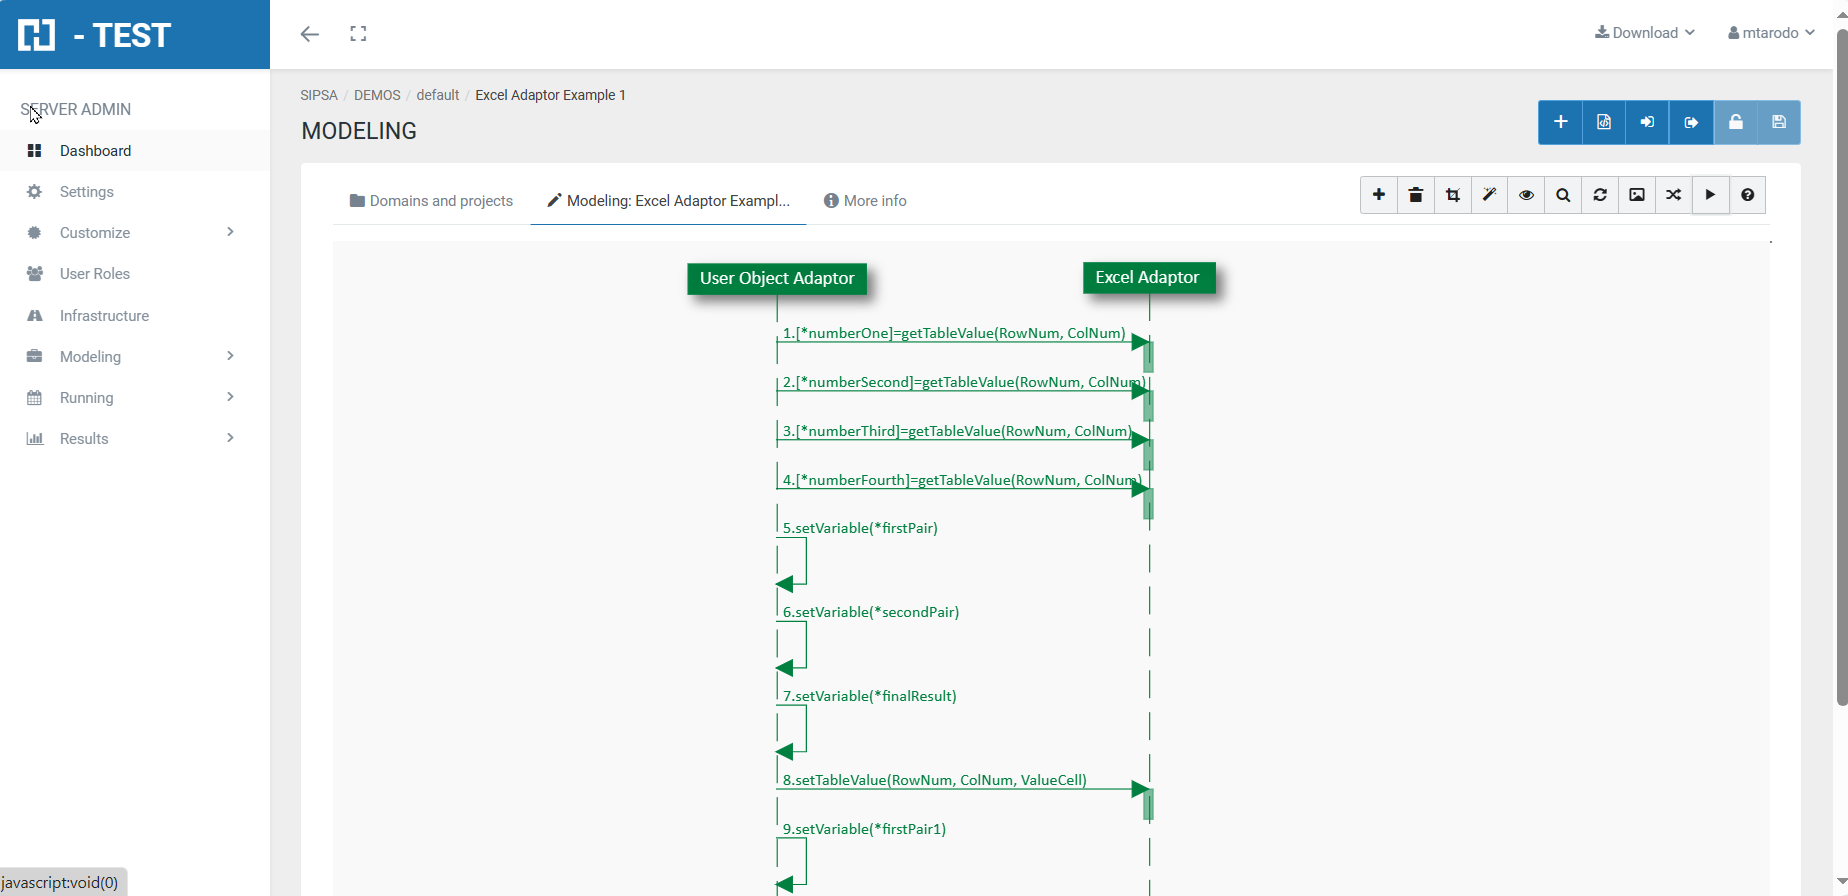
Solving the test case
In this first resolution, we have designed this test case using two Adaptors: the User Object Adaptor, the Excel Adaptor.
The Excel Adaptor will attempt to read and parse the Excel sheet. The necessary initialisation parameters for this example are the following:
- FilePath: represents the full path and file name of the Excel file being handled by this instance of the Excel Adaptor: C:\test\1ExampleExcel.xls
- Sheet: indicates the sheet number of the Excel file we are going to work with: 1
This is the link to the following diagram: https://app.htest.testautomationsystemtool.com/opendiagram?id=202
Files needed to run the case
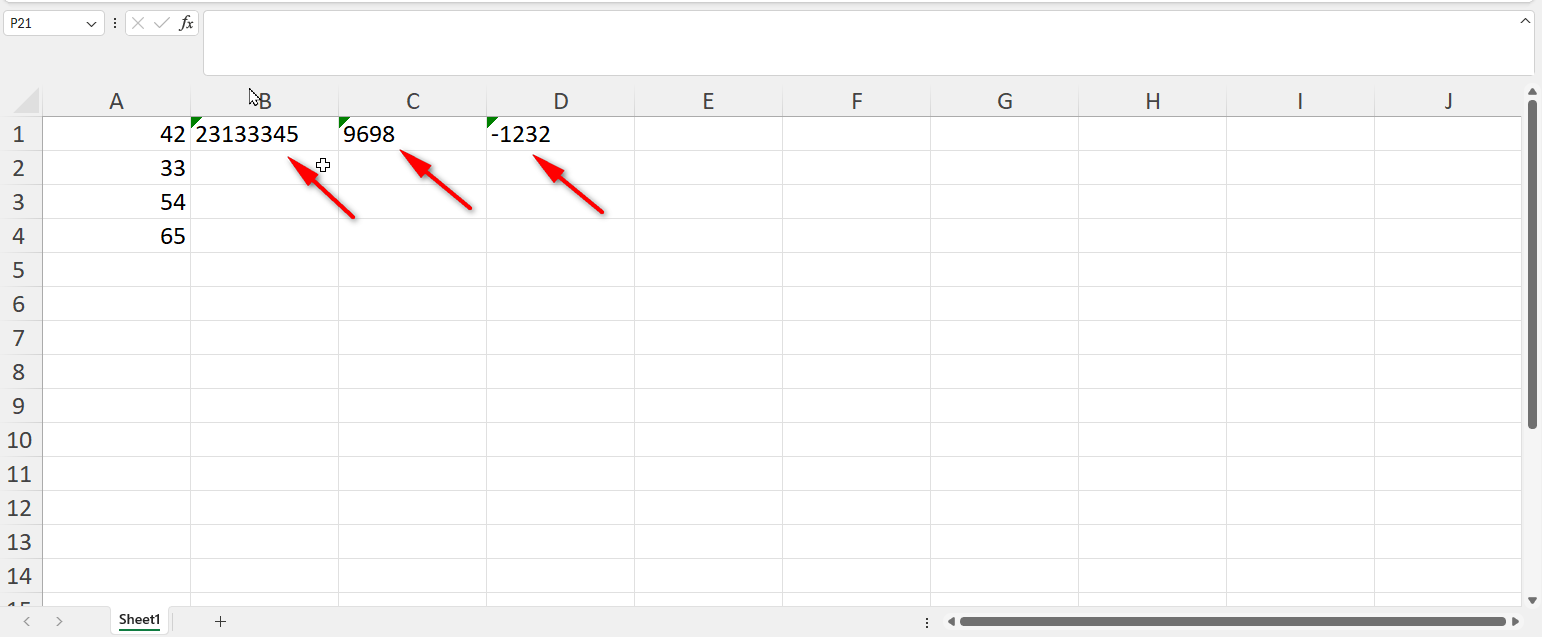
Before designing the test case, we created an xlsx file. In it we put 4 two-digit numbers. We have started with Row 1, Row 2,.... up to Row 4. While the column is always the same, column 1. We save it in the directory C:\test with the name we have given it, in this case C:\test\1ExampleExcel.xls

Important: before executing this test case, we must check that the .xlxs file is closed, otherwise we will get an error.
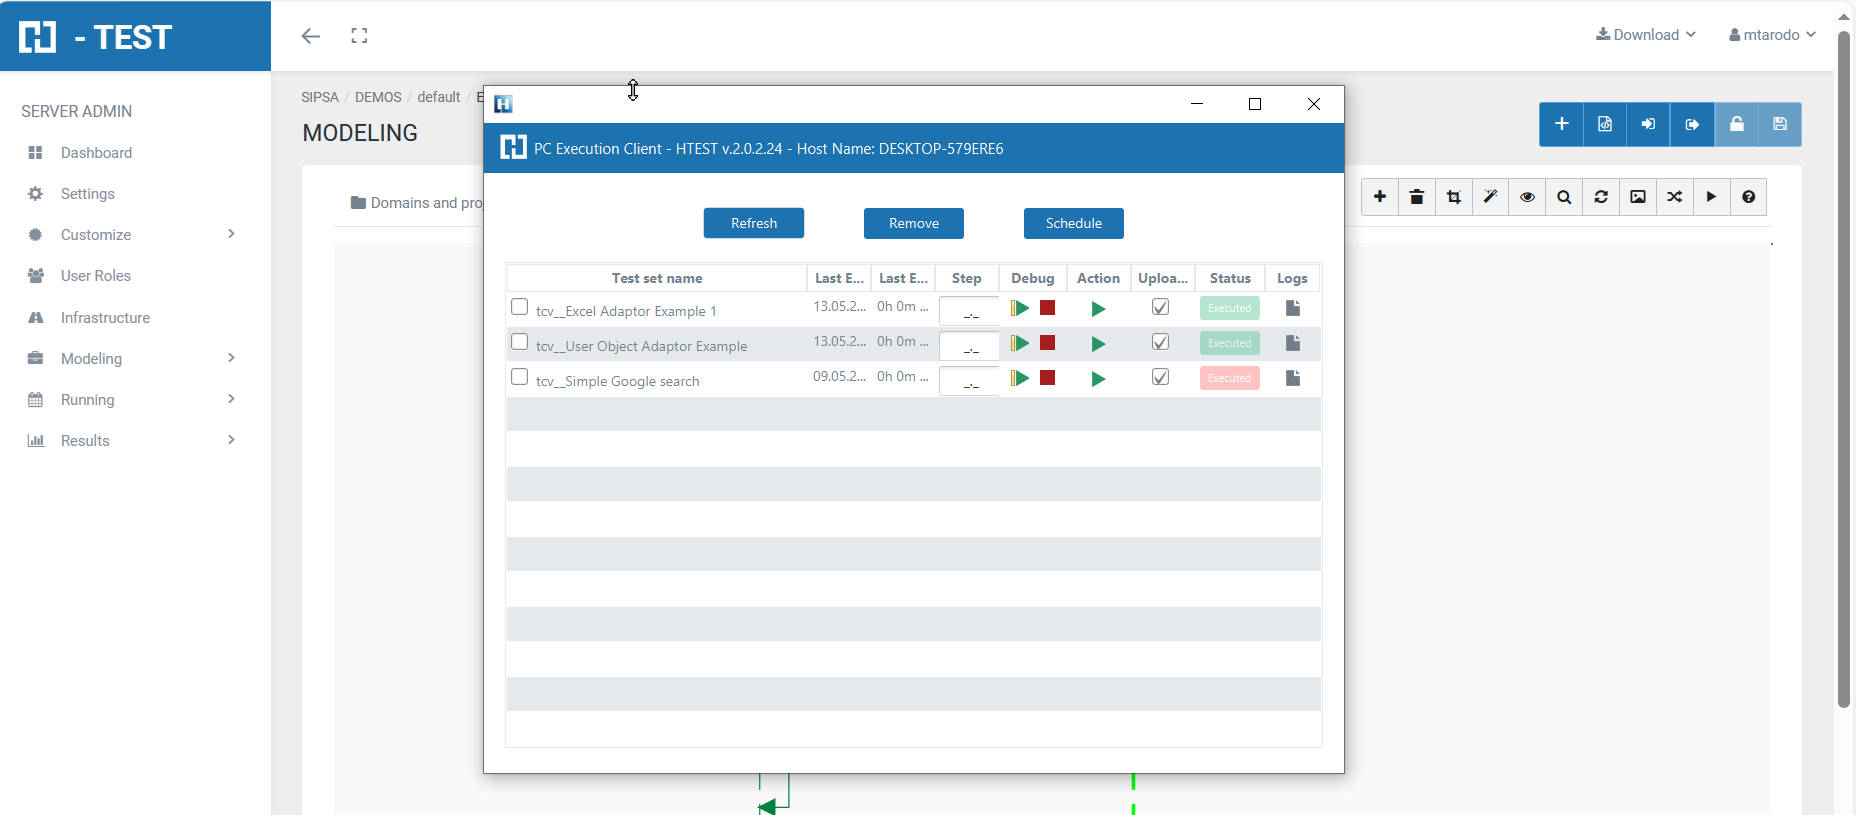
Test Set Execution
When we finish executing this test case, we see if it has been executed correctly:
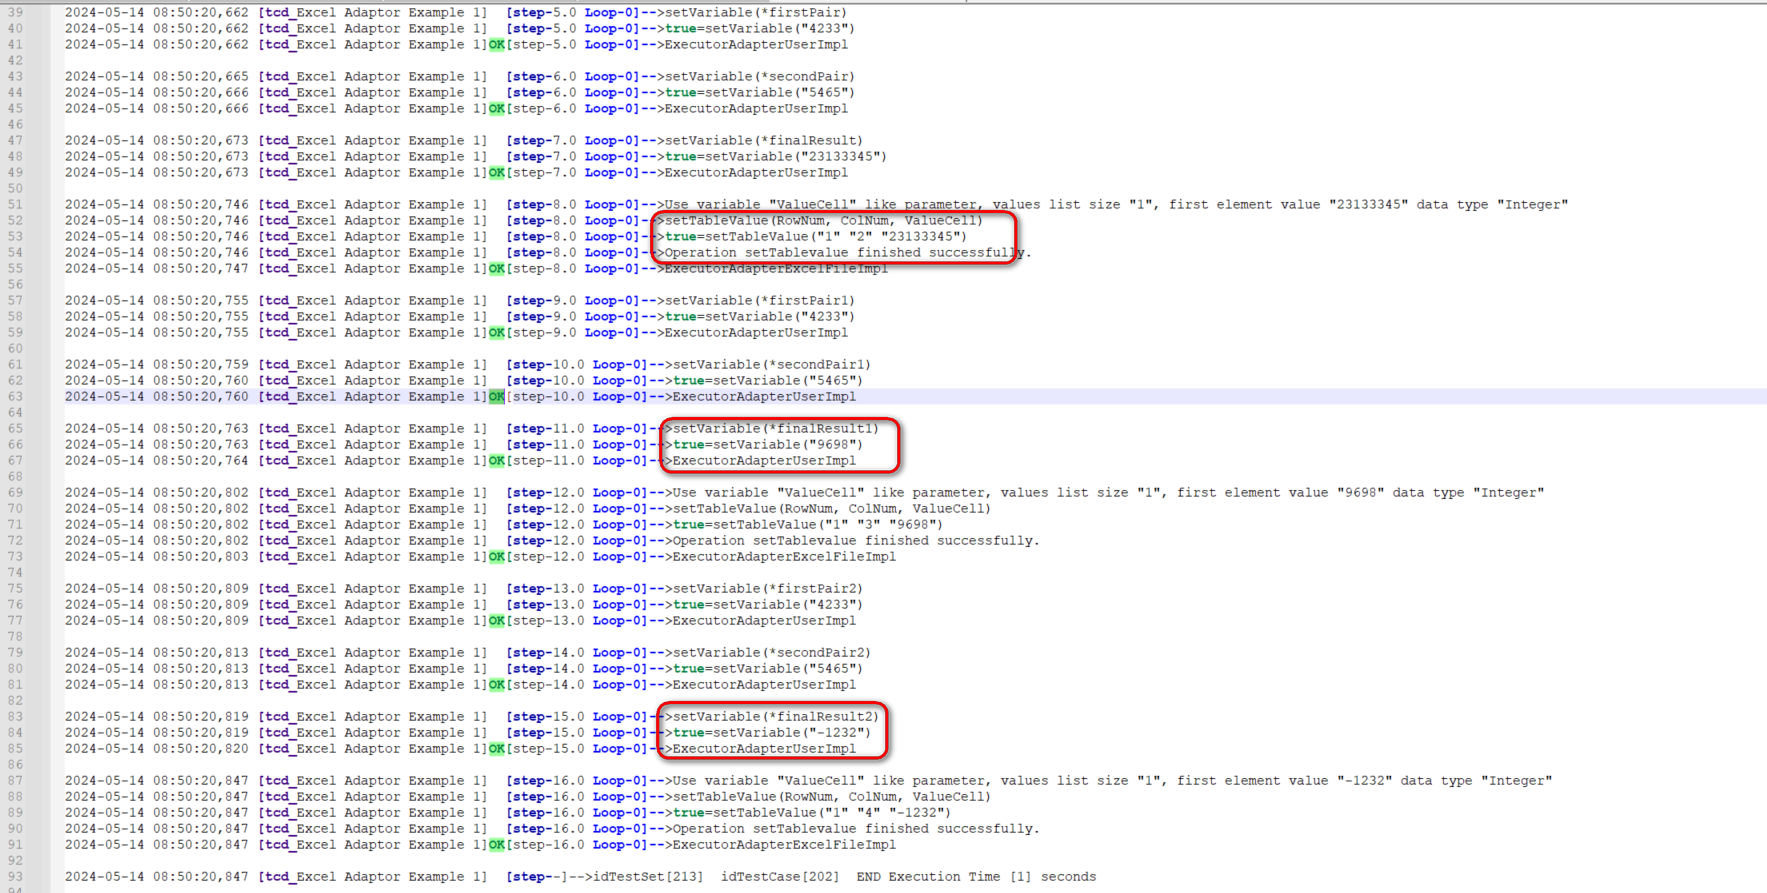
Capture of results
We then open the icon on the right (marked with a red arrow) and we have as a result the evidence folder, where both the log of the execution is stored, as well as all the screenshots, files, etc... if we have checked the "Evidence" box in the general settings of the diagram.
Log of the execution
When returning the results, H.TEST returns a Word document, detailing the steps we have taken, the results obtained from each step, the links to the diagram and the test set, if we have clicked on download document in the Results box.
No Comments