GUI HTML Adaptor Example
Description
Through the GUI HTML Adaptor, H-TEST connects with web applications based on HTML and then, it’s possible to test them. This adaptor has an important companion named Selective Mapping, who is a JavaScript assistant bringing a more friendly user interface for helping to the creation of H-TEST mappings. It’s possible to perform single tests with this adaptor or End to end tests connecting with other adaptors either.
Statement of the exercise
WithUMLan DiagramExcel and Mapping
a Thisloop, isopen 6 web pages: Create an exampleExcel with different URL's and collect them with TAST to open them in the GUI adapter.
Tip: use the function getNumColumns or getNumRows and use it as the end value of a UML Diagram which uses the GUIloop. HTMLUse Adaptor.while or for loop of H-TEST.
Solving the test case
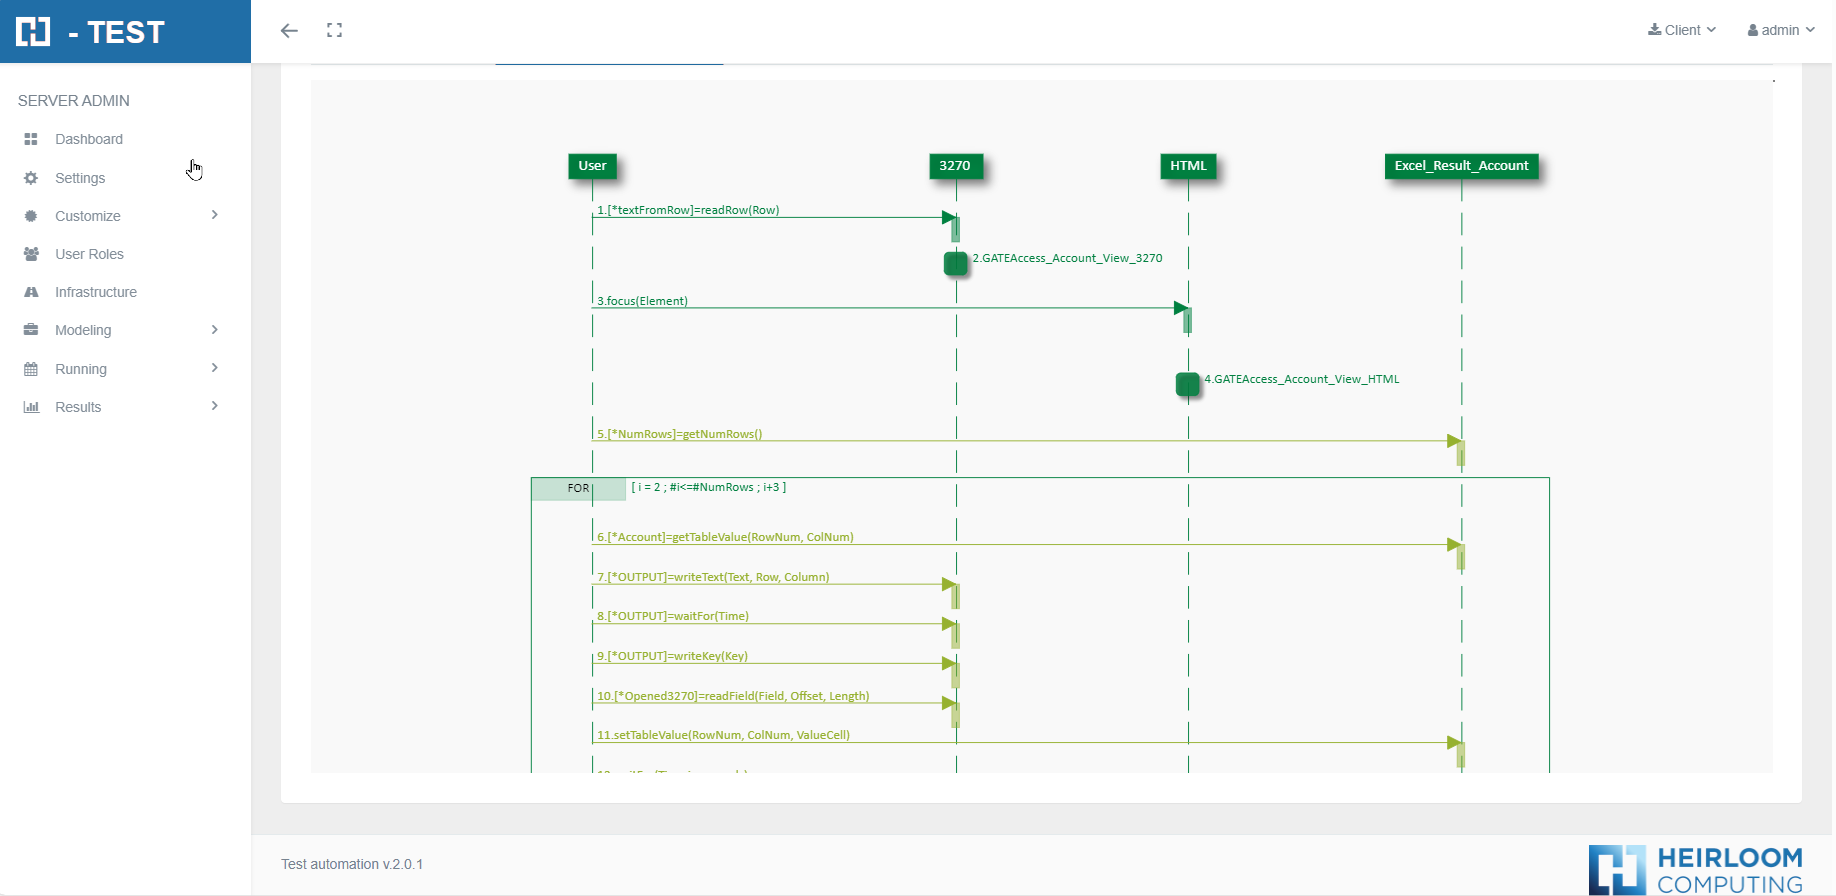
We haveThisdesigned this test case using three Adaptors: the User Object Adaptor, the Excel Adaptor, and the HTML GUI Adaptor. We have also created the WHILE loop, with which we will execute the same steps, as long as the condition we indicate in the properties of the Fragment is an example of interactions between the GUI HTML Adaptor with other adaptors in an E2E test.
NECESITO IMAGENfulfilled.
The Excel Adaptor will attempt to read and parse the Excel sheet. The necessary initialisation parameters for this example are the following:
- FilePath: represents the full path and file name of the Excel file being handled by this instance of the Excel Adaptor: C:\testURLsPERIODICOS.xlsx
- Sheet: indicates the sheet number of the Excel file we are going to work with: 1
As a part of the mapping process, you should provide the adaptor’s information, regarding to connect and use it.
-
Url: first url to locate when the adaptor is created.
-
Browser (optional): the browser you will use in the test (e.g.: IE, Chrome).
-
Validate Insert Values: it’s indicates if the adaptor should validate or not the values which receive the adaptor during the execution. By default, is unchecked. The recommendation is to maintain unchecked for performance reasons. This field is very useful in special test cases, but in general it’s not necessary to use it.
Test Set Execution
AfterWhen we finish executing this test case, we see if it has been executed correctly:
Capture of results
We then open the icon on the right (marked with a red arrow) and we have as a result the evidence folder, where both the log of the execution is stored, as well as all the screenshots, files, etc... if we have checked the "Evidence" box in the general settings of the diagram.
We then open the icon on the right (marked with a red arrow) and we have as a result the evidence folder, where both the log of the execution is stored, as well as all the screenshots, files, etc... if we have checked the "Evidence" box in the general settings of the diagram.
When returning the results, H.TEST returns a Word document, detailing the steps we have taken, the results obtained from each step, the links to the diagram and the test setset, execution,if immediately youwe have theclicked results.on Theredownload aredocument two main elements you can verify:
Logs:in thestepResultsby step information of the execution, with:the results.the methods had been executed.the timelines.
Evidences:the screenshots or evidence information by step, in case they have requested.