Computer setup for H-TEST use
For being able to use H-TEST, it is needed to make a short configuration in the pc to let the program work as expected, be able to use the client, and avoid the security messages to come out every time that the tool is open. First of all, a set up for the client-permissions is needed. The configuration is performed following this guide:
Guide for basic use of H-TEST
It will be necessary to perform the following steps:
- Check you have Java Runtime Environment (JRE) installed. To verify this, open a Windows command console and type: java -version. If you have the JRE installed, it will show which version you have, the version 1.8.0 is required. In case you don't have it installed, download it from the following link: https://www.java.com/en/download/. This step is completely needed.
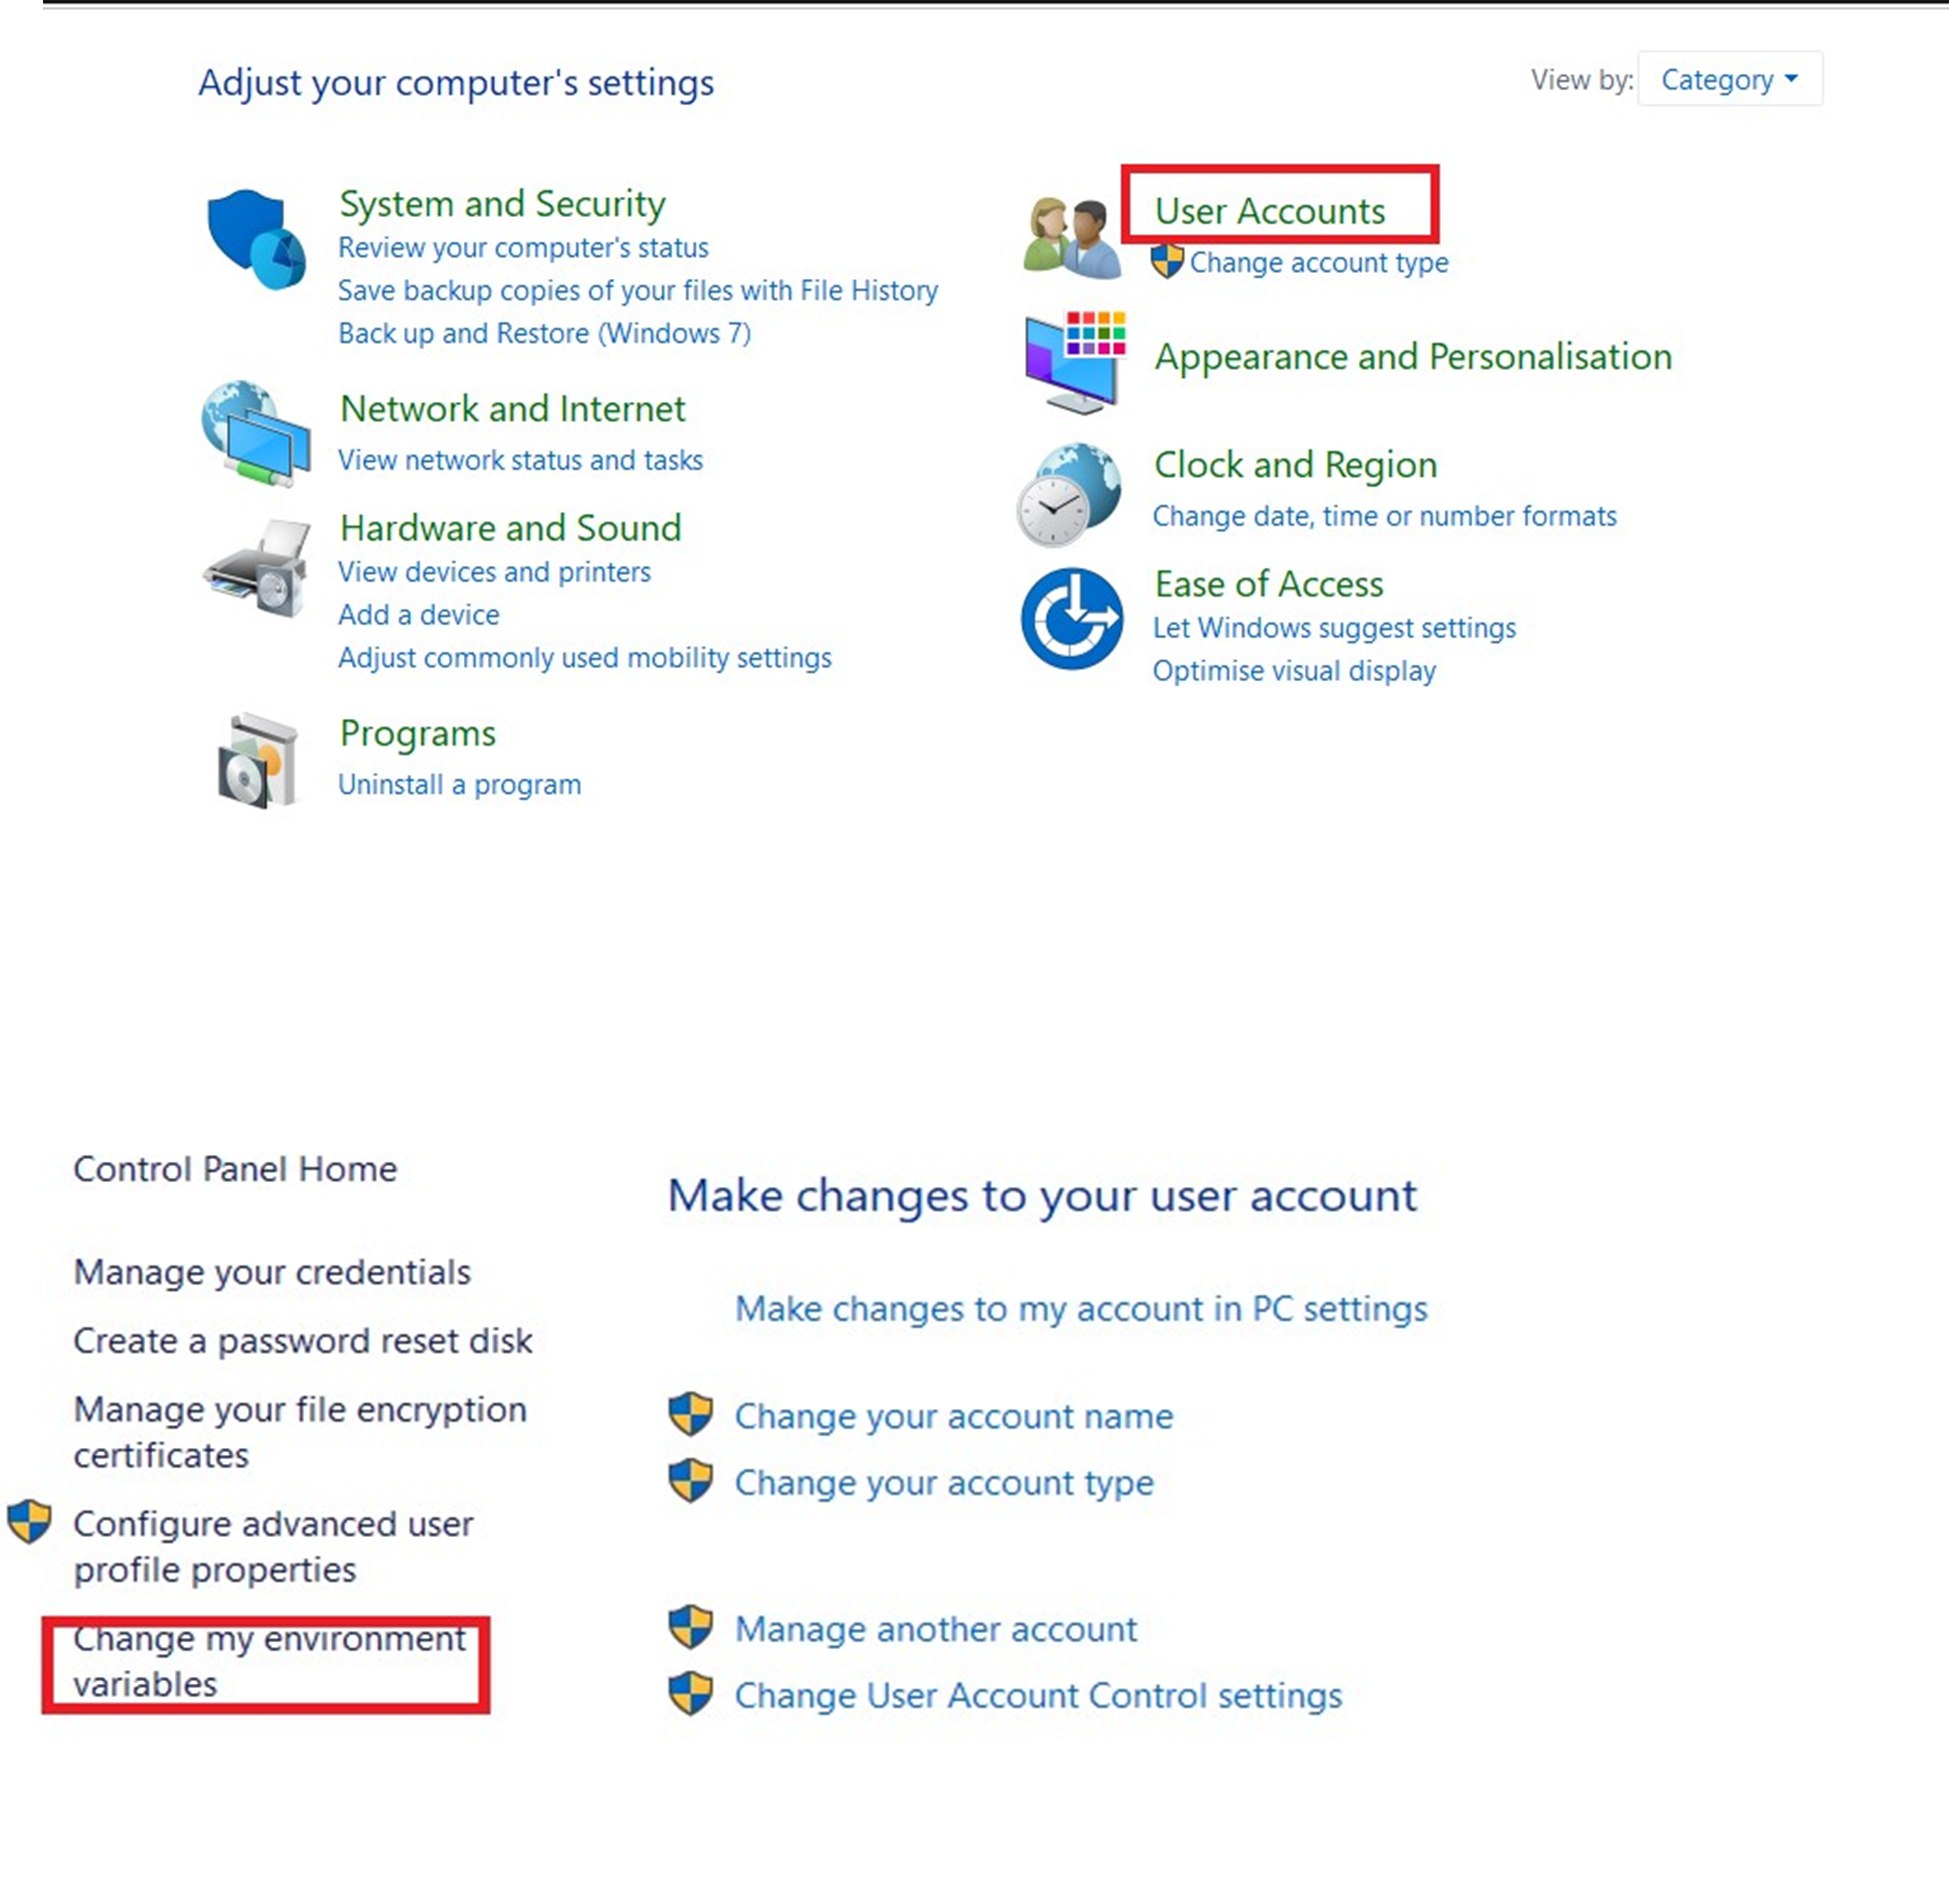
- Change the two environment variables: Run from the control panel → User Accounts → User accounts → Change my environment variables →
a. If you have PATH, click on “edit” while selecting it. If you don’t have it, click on “new”.

Add new values to variable PATH:
C:\Program Files(x86)\Java\jre1.8.0_281
C:\Program Files(x86)\Common Files\Oracle\Java\javapath
C:\ProgramData\Oracle\Java\javapath
(the numbers on the jre should correspond with your jre version).

- Restart the PC.
- Open java options following these steps:
a. Click the Windows start button.
b. Go to “control panel”.
c. Go to “Programs”.
d. Click on “Java”.
- Add exception on the “Edit Site List” option on the “Security” tab:
a. Click on “edit site list”.

b. Click on “Add”
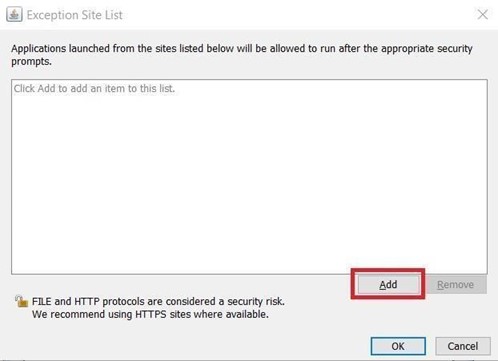 c. Add locations:
For SIPSA environment: https://app.cloud1.testautomationsystemtool.com/
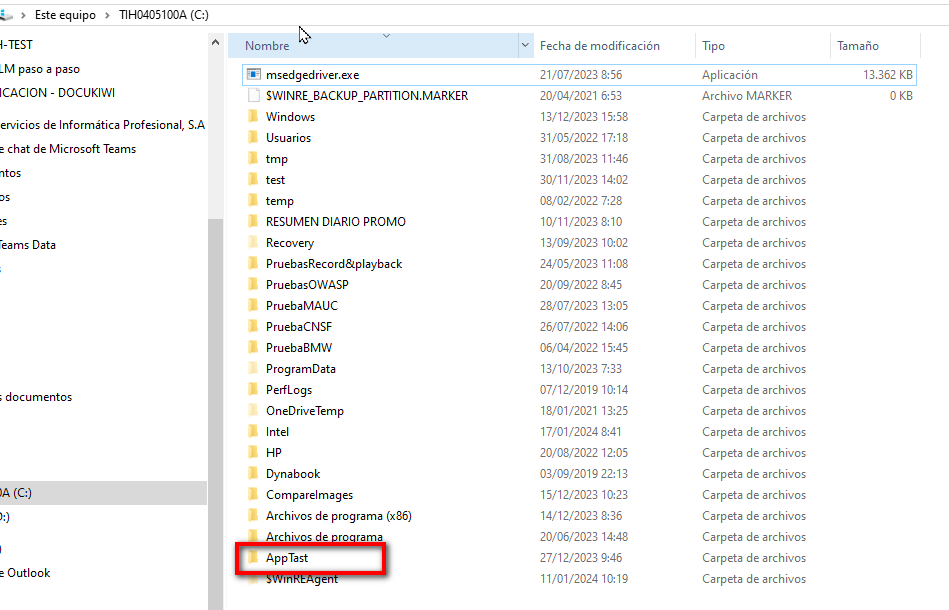
- Create a folder named “AppTast” on the “C:” Drive
7. Download the drivers from TAST, and put them inside the appTAST folder, in another folder called “seleniumDriver”.
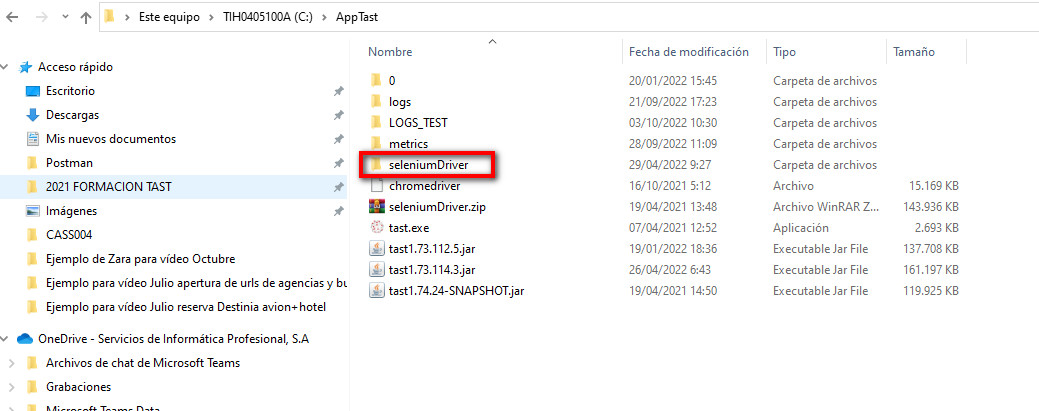
At the same time, here you need to separate them into other folders. These folders are called: “chromedriver”, “edgedriver” and “firefoxdriver”, depending on which ones you need.
Guide for H-TEST Mobile Adaptor
This will be a guide to install and set up the components required to use the Mobile Adaptor with H-TEST.
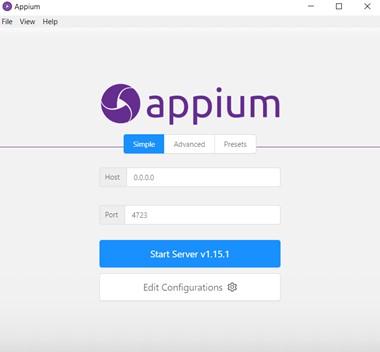
Dowload Appium
Download Android Studio
Change Environment Variables
Press the Windows button, and type “environment”. Click on “Edit environment variables for your account”. This is the same as the first few steps on the Guide for basic use of TAST.
Here you need to make a new variable called ANDROID_HOME. And its value needs to be, if you followed the whole guide: C:\Users\YOURUSER\AppData\Local\Android\Sdk”, where YOURUSER is the username you are currently using.
Then you need to go to the PATH variable and press “Edit”. Press “New” and put in the value “C:\Users\YOURUSER\Appdata\Local\Android\Sdk\platform-tools”.
After all of this is done, restart your computer.
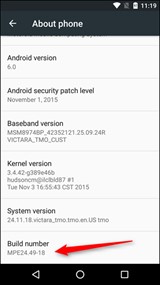
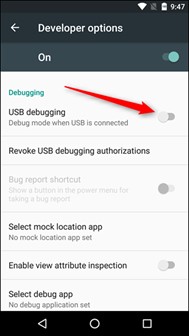
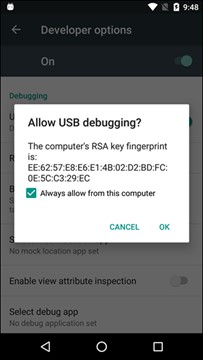
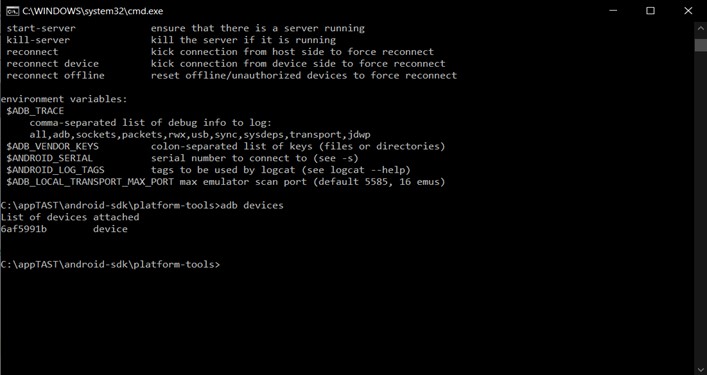
Configure your device to use it with Appium


Guide for H-TEST Host Adaptor (3270/5250)
This will be a guide to obtain and set up the necessary components to execute the 3270 and 5250 adapter with H-TEST.
-
Go to the directory “M:\PLM\10 TAST” and locate the folder “tk4-_v1.00_current”, and the files “jagacy3270-5.4.0.jar” and “tn5250j-0.7.6-TAST.jar”.
-
Download these files and copy them to your “C:\AppTast” folder.
-
Once this is done, to execute the 3270 adapter you need to execute the “mvs.bat” located inside the “tk4-_v1.00_current” folder for each time you want to execute a test. You open it, execute a diagram, and to be able to execute another one, you need to close it and open it again before doing so.
-
To execute tests with the 5250 adapter, first we need to set up the connection. If you want to test against any server, you can use pub400.com. You need to make an account, and you will receive two e-mails, one where you need to click the link, and another one with your user and password.
-
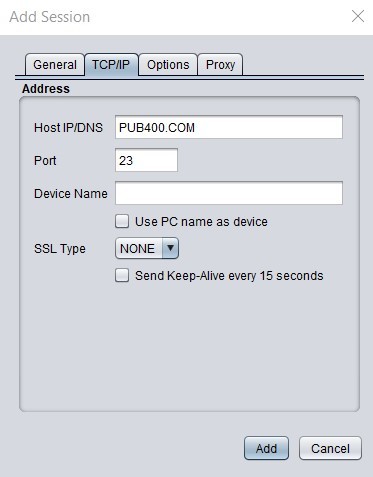
When opening the tn5250j the following window will pop up, and you will need to click on “add”:

- A new window will pop up to set up a new connection, you can name it however you want, and go to the TCP/IP tab.

-
Here is where we will type the host IP, in our case, pub400.com. If you need another one, you will need to know it beforehand. This will also be used on the diagram. On the “device name” you can name it however you want, or use the “Use PC name as device” checkbox.


Once
thisis
done,its already set up and you can start executing cases from the H-TEST client.
H-TEST Complement for Web Functionality
Please click on the following link for the installation, set up guide and how to use the Selective Mapping functionality, helpful when mapping messages from diagrams. This is optional:
Utility for Diagram Mapping in H-TEST
For the installation, set up and guide on how to use the Record & Playback for TAST, which makes the process of mapping the steps of an existing diagram easier, click on the following link. This is optional:
Guide for Notepad++ with colored logs
This will be a guide to install Notepad++ to be able to see TAST logs with different colors. Please follow the following steps:
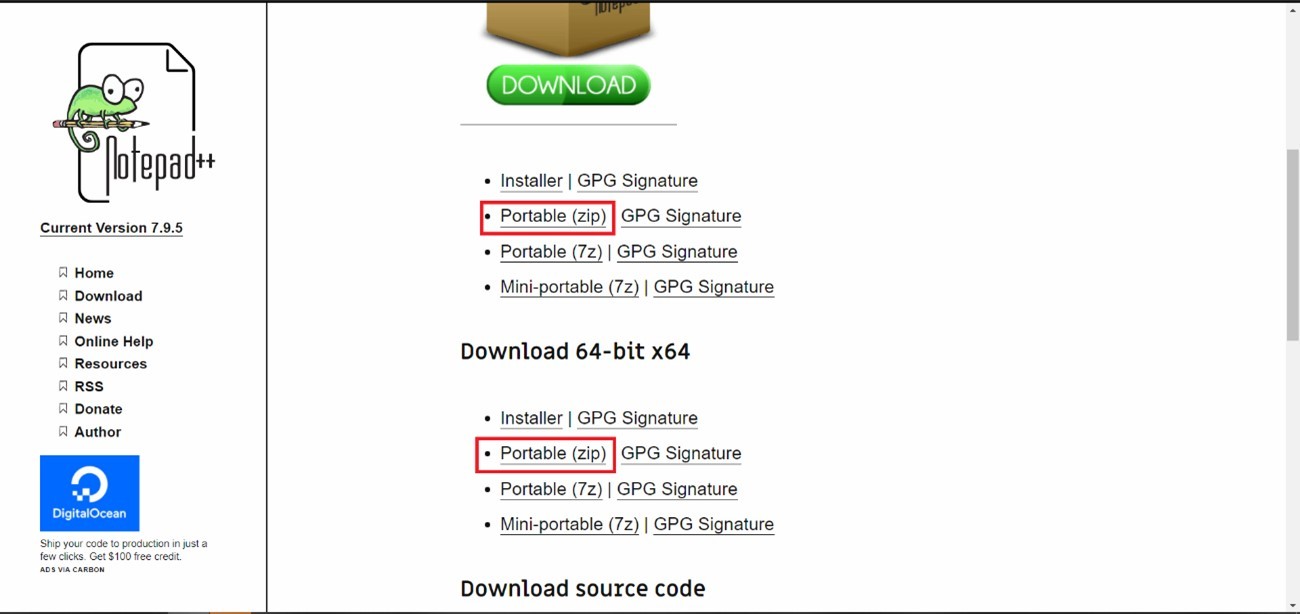
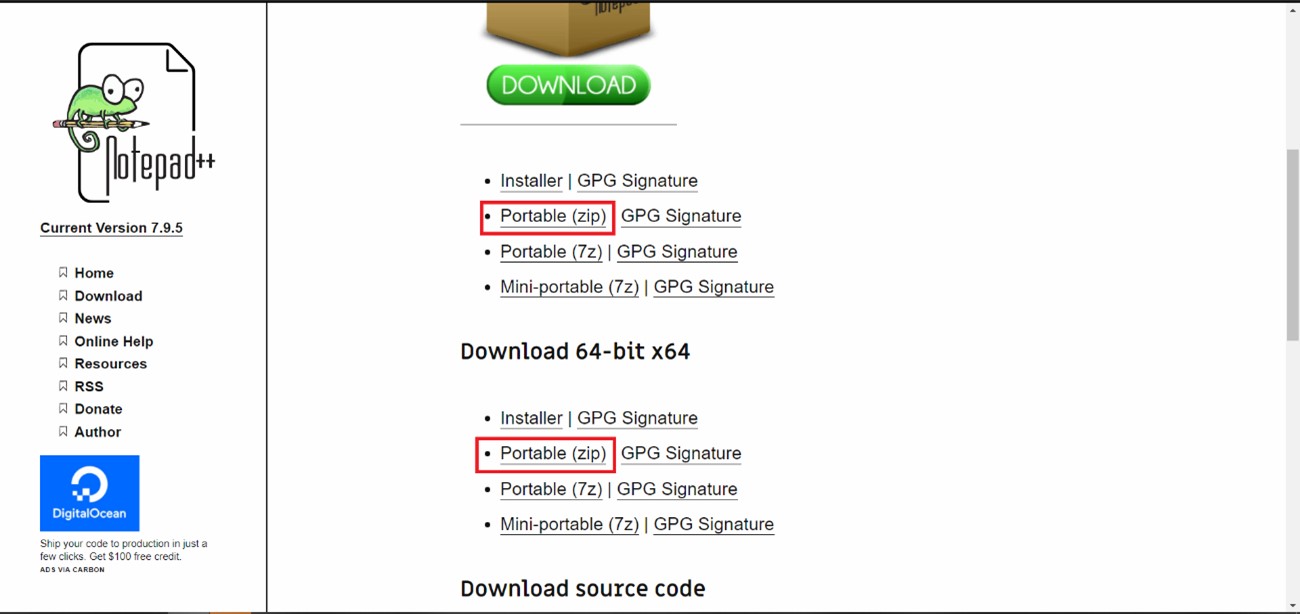
- Download the latest release of the Portable (zip) version of Notepad++ from the following link: https://notepad-plus-plus.org/downloads/. For 32 bits if your system is 32 bits, and 64 if your system is 64.
- The language can be downloaded from this link: https://www.sipsa.net/wp-content/uploads/2021/10/tastxml-2.zip
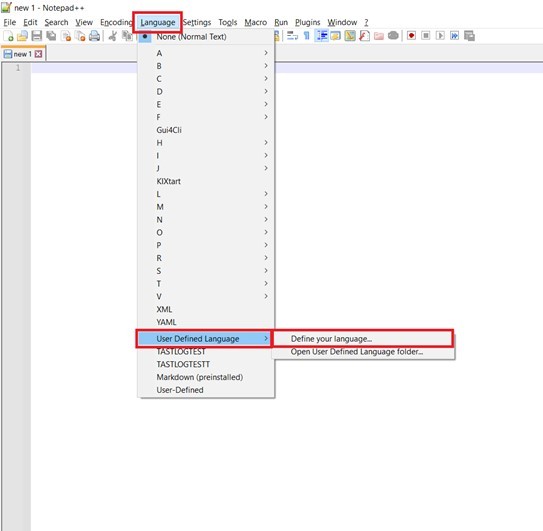
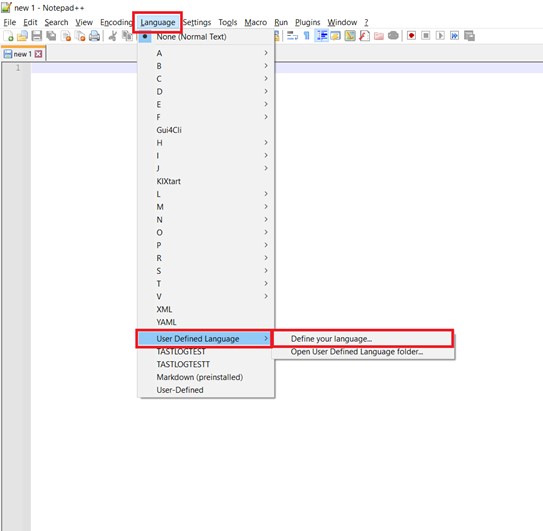
- Open Notepad++ and go to Language → User Defined Language → Define your language.
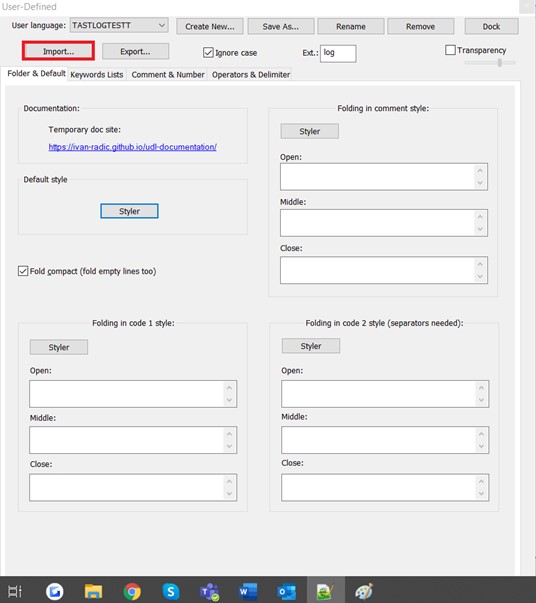
-
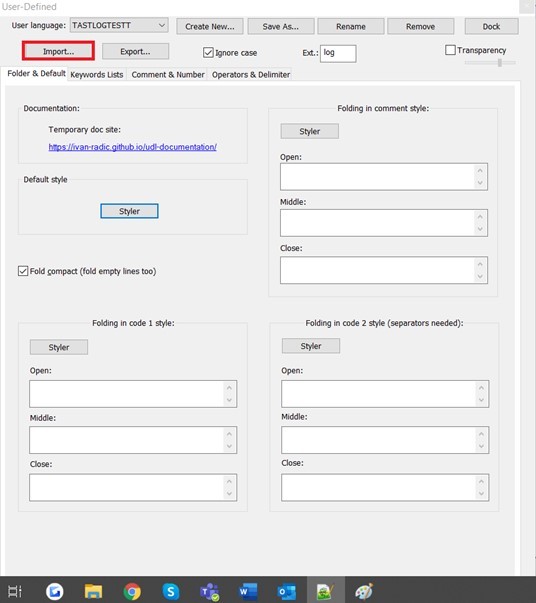
Press “Import” and choose the “TASTLOGTEST.xml” file you just downloaded.
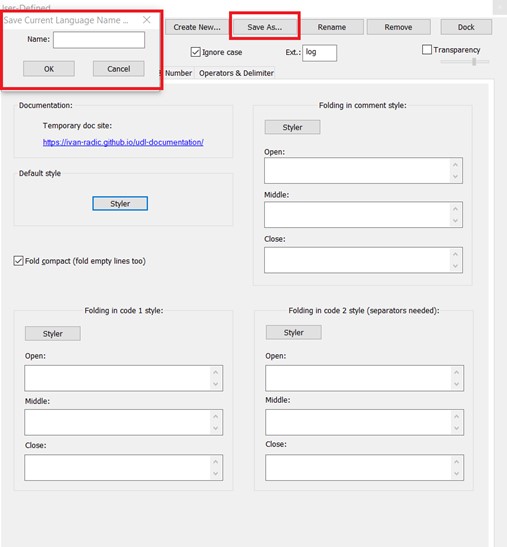
- Press “Save as…” and name it with the name you want, for example, TASTLanguage, or TAST.
Now, whenever you open a .log file, you can go to Language and choose the name you just saved at the bottom, and the log file will be have important words colored. If you want to add more words, you can edit it with the same previous route: Language → User Defined Language → Define your language.